By Lee Garvey
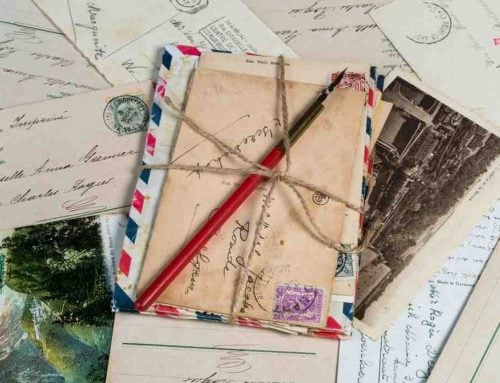
Being part of the Click2Mail team for 18 years means I’ve observed the absolute delight people experience when sharing personal news via the mail. I’ve always especially appreciated the simple, sincere joy our clients feel sending birth announcements. For new parents, it’s a heartfelt way to formally introduce their little one to family and friends, strengthening bonds with those who eagerly share in their excitement and overwhelming happiness. Receiving these announcements allows loved ones to feel included in a significant life event, prompting well wishes and fostering a sense of community around the growing family. These small, but impactful pieces of paper become tangible reminders in our increasingly digital world, cherished by both sender and receiver. In fact, I have several birth announcements that have been hanging around on my fridge for years.
This year, I decided to blend my understanding of direct mail with my other passion: my goats. As the owner of both a French Alpine dairy herd and a herd specializing in eco-friendly brush clearing, the arrival of new baby goats this spring presented a unique opportunity. Inspired by the joy surrounding traditional birth announcements, I created charming personalized mailers featuring adorable photos of the newborns, and mailed them to our landscaping clients with a heartfelt thank you for their business. The overwhelmingly positive response was a heartwarming reminder of the power of a personal touch – and the undeniable appeal of baby goats!
While intended purely as a joyous announcement, the initiative surprisingly boosted business. Clients enthusiastically shared pictures of the announcements with their local neighborhood Facebook groups, reminding neighbors of the goats’ hard work from the previous year. This organic buzz generated multiple requests for landscaping estimates that quickly turned into new jobs.
Launch 500 postcards / flyers / letters in ~5 minutes. We print, address, and mail for you.
Upload your design and mailing list, pay, done.
No post office run. No subscriptions.
Next-business-day mailing for most products.
From Pasture to Post Office – How it Happened
Now, you might be wondering how these charming goat “birth announcements” came to life and made their way into the mailboxes of our valued clients. The secret lies in the seamless combination of two user-friendly platforms: Canva for design and Click2Mail’s Mailing Online for hands off printing and mailing.
Canva is a fantastic design tool that truly democratizes creativity. Whether you’re a seasoned designer or just starting out, its intuitive interface makes crafting visually appealing materials a breeze. While Canva offers a wealth of premium content for subscribers, its extensive library of free templates and design elements ensures that everyone can create beautiful designs without breaking the bank.
Once the design for my adorable announcements was perfected in Canva, sending them to our clients was equally straightforward thanks to Click2Mail’s Mailing Online. This easy-to-navigate platform simplifies the entire mail job creation and submission process. Setting up an account is free, and you only pay for the actual cost of your mailing – making it an accessible and efficient solution for businesses of all sizes.
Now I’m going to show you how I did it.
Picking the Mailer Format
The first thing I had to do to create these baaa-by announcements was decide which Click2Mail mailer format I wanted to use. I went with the single sided notecard for a couple reasons:
- It’s beautiful
- It’s affordable.
- It looks like a personal mail piece. There is nothing about the notecard that indicates marketing mail. This encourages a strong open rate – meaning people who receive a notecard are going to open it and read it.
Crafting the Cute: Designing Your Announcement in Canva
Once I had the idea for our goat “birth announcements,” my next stop was the ever-intuitive Canva. Here’s a step-by-step look at how I designed our mailpiece:
- Start a New Design: After logging into Canva, click the prominent “Create a design” button in the upper right corner.

- Define Your Custom Size (with Bleed!): To ensure our design is printed beautifully edge-to-edge on our notecards (which are 4.125″ x 5.5″), it’s crucial to include a bleed area. Click “Custom size.” For a standard notecard with a 0.25″ bleed on all sides, enter 6″ for the Width and 4.625″ for the Height, making sure “in” (inches) is selected as the Units. Then, click “Create new design.”


- Explore Canva’s Templates for Inspiration: Click on the “Design” tab in the left-hand menu to browse Canva’s vast library of templates. These are fantastic starting points, often featuring well-arranged layouts of photos and text. Keep an eye out for the crown icon in the lower right of a template – this indicates it’s a premium option for paid subscribers. The templates without the crown are free to use. For our announcement, I selected a vibrant green template (as you can see in the example below).

- Customize Your Canvas: Once your chosen template appears on your design, the left-hand menu becomes your customization hub. The tools I used most extensively were “Text” and “Uploads.”
- Bring in Your Own Adorable Imagery: “Uploads” is where you’ll add your personal touch. Click on “Uploads” and then “Upload files” to bring in your photos and any logos you want to include. I uploaded a whole herd of charming baby goat photos and our business logos.

- Place and Position Your Photos: After your images are uploaded, simply click on them to add them to your design. You can then drag and drop them with your mouse to arrange them as desired.
- Brand Your Colors: Click on different elements within the template (like shapes or backgrounds) to reveal color palette controls at the top. This allows you to easily change the colors to align with your brand identity. After some tweaks, my initial green template evolved into something uniquely ours (as shown below).

- Personalize Your Message with Text: Click on any existing text boxes in the template to select them and reveal the text editing controls at the top. You can change the font, size, color, alignment, and more. Feel free to drag and drop text boxes to reposition them as needed. Remember, the template is just a foundation – make it your own!

When I’m finished adding text, the image looks like this:

- Ready to Mail: Downloading Your Design: With the design perfected, it’s time to prepare it for Click2Mail. Click “Share” in the top right corner of the Canva interface, and then select “Download.”

- Choose the Right File Type: For optimal printing quality with Click2Mail, select “PNG” as the File type. Finally, click “Download.”

- Your design is now ready to be uploaded and sent through Click2Mail’s Mailing Online!
So there you have it, from pasture to post office, a little bit of goat joy made its way into the mailboxes of our wonderful clients. And honestly, seeing their reactions, the photos popping up in neighborhood groups, the phone ringing with new job requests—it wasn’t just good for business, it warmed my heart. It reminded me why I love what I do, both with my goats and with Click2Mail. It’s about connection, about sharing something genuine, and about the simple, powerful act of sending a little piece of happiness through the mail. Who knew a few baby goats could make such a big difference? Maybe it’s time you tried a little ‘baa-by announcement’ of your own!
Stay tuned for Part 2 of this series, where I’ll provide you with step by step instructions for submitting a notecard job using Click2Mail Mailing Online!

About Lee
Lee Garvey is the founder of Click2Mail, a pioneering platform in cloud-based direct mail automation since 2003. Under his leadership, Click2Mail has become a trusted USPS partner, helping thousands of businesses streamline their mailing processes and effectively bridge the gap between digital and physical marketing.