By Lee Garvey
Most direct mail campaigns don’t fail because of a weak offer or a bad list. They fail because someone designed a beautiful piece and submitted it without checking whether it would actually survive the postal system. A misplaced address block, a missing bleed margin, or a file submitted at the wrong resolution can mean your campaign either gets rejected before it ships or arrives looking nothing like what you approved.
This checklist covers the key design specifications that keep your mailpieces USPS-compatible, print-ready, and effective from the moment they leave the designer’s hands to the moment they land in someone’s mailbox.
Launch 500 postcards / flyers / letters in ~5 minutes. We print, address, and mail for you.
Upload your design and mailing list, pay, done.
No post office run. No subscriptions.
Next-business-day mailing for most products.
Start with an Automation-Approved Template
Before touching colors, fonts, or images, start with a USPS automation-approved template sized to your specific mailpiece format. The USPS runs mail through OCR equipment that reads address blocks in a defined zone — and if your design places artwork, text, or a background image in that zone, the machine may not be able to read the address at all, which means the piece either gets flagged or doesn’t qualify for automation discounts.
Starting with the right template locks in the correct address placement before you build anything around it. It’s a simple step that’s easy to skip and costly to fix after the fact. The last thing you want is to finalize a design and discover your hero image is sitting exactly where the address needs to print.
Templates also ensure your piece qualifies for presort discounts, which can meaningfully lower postage costs at volume — a benefit worth protecting from the start.
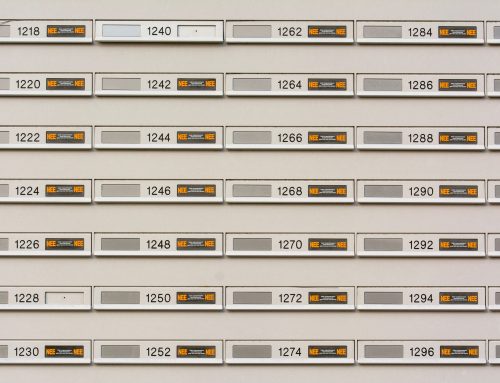
Address Block and Clear Zone Requirements
The address block is the most regulated part of any mailpiece, and its placement determines how the rest of your design gets arranged. Here’s what needs to be in order:
- Address placement: The delivery address must appear in the lower right portion of the address side, within the OCR read zone defined by the USPS for your mailpiece size
- Clear zone: A clear zone of at least 5/8″ from the bottom edge and 4.5″ from the right edge must remain free of any ink, images, or background elements other than the address
- Return address: Required on all First-Class Mail and most marketing mail — placed in the upper left of the address side
- Barcode clear zone: The bottom 5/8″ strip (where the IMb tracking barcode prints) must be free of any design elements
- Indicia or stamp area: Reserve the upper right of the address side for postage — no design elements should overlap this space
One commonly forgotten element: your phone number. It sounds obvious, but it gets left off more often than you’d think. A piece without a clear way to respond — whether that’s a phone number, URL, or QR code — has nowhere to send the reader after it gets their attention.
Size, Bleed, and Safe Zone Specs
Physical dimensions determine your postage class, your print specs, and how your piece will be handled in automated sorting. Get these right before anything else:
- Bleed: Extend any background colors or images 1/8″ (0.125″) beyond the trim edge on all sides to prevent white borders after cutting
- Safe zone: Keep all critical content (text, logos, CTAs) at least 1/8″ to 1/4″ inside the trim edge — content too close to the edge risks being cut off
- Resolution: All images should be at least 300 DPI at final print size; low-resolution images look blurry in print even if they look sharp on screen
- Color mode: Submit files in CMYK, not RGB — RGB is a screen color mode and will shift when converted for print, sometimes significantly
- File format: PDF is the standard for print submission; flatten all layers, embed all fonts, and outline any text that uses custom typefaces
These specs apply across all mailpiece formats — postcards, letters, flyers, brochures, and EDDM pieces all follow the same core print rules, with format-specific variations in dimensions and address zone placement.
Content and Copy: Design Choices That Hurt Response
Information Overload
One of the most consistent mistakes in direct mail design is trying to say everything at once. A postcard has a 100% open rate — everyone who gets it sees the front — but you only have a second or two to hook them. One strong headline, one clear offer, one call to action. The design should make that hierarchy obvious at a glance, not bury the lead under a wall of text.
Missing or Weak CTAs
Every piece needs a clear next step. Whether it’s a phone number, a URL, or a QR code that bridges print and digital, the path to response has to be unmissable. Don’t tuck the CTA in small type at the bottom. Give it space, contrast, and prominence — it’s doing the most important job on the piece.
Ignoring the Address Side
The back of a postcard (or the address panel of a self-mailer) is valuable real estate that most designers treat as an afterthought. A well-designed address side with a supporting message or secondary offer can meaningfully boost response, especially when the piece sits on a counter for a few days before someone acts.
File Submission Checklist
Before you submit for print, run through this final check:
- [ ] File submitted as a flattened PDF with fonts embedded or outlined
- [ ] Color mode set to CMYK
- [ ] Resolution at 300 DPI or higher for all images
- [ ] Bleed extended 0.125″ on all sides
- [ ] Critical content inside safe zone (at least 0.125″ from trim)
- [ ] Address block in correct OCR read zone per USPS specs for your format
- [ ] Clear zone at bottom free of design elements
- [ ] Return address included in upper left
- [ ] Postage/indicia area reserved in upper right
- [ ] Phone number, URL, or QR code present and legible
- [ ] Template confirmed as USPS automation-approved for your mailpiece size
If you’re unsure whether a specific mailpiece format meets USPS requirements before you commit to a full print run, a small test batch is always worth it.
Skip the Guesswork with Click2Mail
Click2Mail takes the spec uncertainty off your plate. Every mailpiece format in the platform comes with free, downloadable USPS automation-approved design templates built to the correct dimensions, bleed lines, safe zones, and address placement requirements. You design to the template, upload your file, and the system handles address cleansing, barcode application, and postal compliance automatically.
No subscription fees, no minimum volumes, and next-day mailing for most products means you can go from approved design to pieces in the mail faster than almost any other option. Visit Click2Mail to download templates for your next mailpiece format and get your campaign print-ready from the start.

About Lee
Lee Garvey is the founder of Click2Mail, a pioneering platform in cloud-based direct mail automation since 2003. Under his leadership, Click2Mail has become a trusted USPS partner, helping thousands of businesses streamline their mailing processes and effectively bridge the gap between digital and physical marketing.